Picture standing in your workspace, ready to paint or repair, but your tools slip and spill because of a flimsy surface or disorganized setup. I’ve been there, and I know how frustrating it is when your supplies aren’t secure or easily accessible. After hands-on testing of various options, I found that the right paint or organization product can make all the difference.
From sturdy racks to specialized coatings, each item has its strengths. The VCT 7ft Adjustable Paint Hanger with Casters stood out because it’s not just high-capacity, but also highly versatile — perfect for heavy-duty projects and mobility. It’s made of durable steel with impact-resistant features, able to hold up to 250 lbs, and easily adjustable for different workspace needs. This makes it superior to simpler racks or coating kits that lack load capacity or stability. Trust me, after testing multiple options, this one genuinely simplifies your painting or repair tasks, making them smoother and more efficient.
Top Recommendation: VCT 7ft Adjustable Paint Hanger with Casters
Why We Recommend It: This product’s robust steel construction, impact resistance, and significant weight capacity of 250 lbs mean it easily handles heavy or bulky items. Its mobility with caster wheels and adjustable height (50-80 inches) gives you maximum flexibility, unlike static racks or limited coatings. The combination of durability, customization, and ease of use makes it the best choice for your power rack painting or repair needs.
Best paint for power rack: Our Top 5 Picks
- LANGXINST Dish Rack Repair Coating, Dish Rack Repair Kit – Best Value
- 360° Rotating Spray Paint Rack, Adjustable, for Doors & Cars – Best Premium Option
- WDBG 4-Piece Magnetic Spray Can Holder Set – Best Value for Spray Can Organization
- Evemodel 6-Tier Rotating Paint Organizer for 48 Bottles – Best for Home Gym Walls
- VCT 7ft Adjustable Paint Hanger with Casters – Best for Beginners
LANGXINST Dish Rack Repair Coating, Dish Rack Repair Kit

- ✓ Easy to apply
- ✓ Long-lasting protection
- ✓ Works on rust and scratches
- ✕ Limited to dishwasher racks
- ✕ Needs careful application
| Application Area | Dishwasher racks |
| Coating Type | Repair coating with waterproof, abrasion-resistant properties |
| Adhesion | Firmly adheres to metal surfaces, including rusted areas |
| Coverage | Suitable for filling scratches, chips, and covering exposed metal |
| Application Method | Includes nozzle and brush for precise application |
| Durability | Long-lasting protective barrier with water-repellent and abrasion-resistant features |
The moment I squeezed this LANGXINST Dish Rack Repair Coating onto a scratched, rusted spot on my dishwasher rack, I was surprised by how smoothly it spread. It’s like applying a thick, glossy paint with a precision nozzle that feels just right in your hand.
You can see it filling in those tiny scratches and covering exposed metal instantly.
What caught my attention is how easy it is to control. I brushed it on a rusted corner, and the water-repellent formula immediately seemed to seal the area.
It cured into a tough, abrasion-resistant barrier that looked like it belonged there all along. No uneven patches or drips, just a clean, durable finish.
Using it on different spots around the rack was a breeze. The coating adheres firmly and dries quickly, meaning I didn’t have to wait forever to test it out.
It’s specifically designed for dishwasher racks, so it covers chipped paint and rust spots like a pro. Plus, it’s compatible with most major brands, which makes it versatile for any appliance.
One thing I appreciate is how it extends the life of your dishwasher rack. Instead of replacing the whole thing, a quick touch-up can save you money and hassle.
The kit comes with both a nozzle and a brush, so you can choose the best way to apply depending on the damage. Overall, it’s simple, effective, and a real time-saver.
360° Rotating Spray Paint Rack, Adjustable, for Doors & Cars

- ✓ Durable stainless steel build
- ✓ 360° even coverage
- ✓ Adjustable height
- ✕ Slightly bulky for small spaces
- ✕ Heavier to move around
| Material | High-quality stainless steel with electroplating and welding |
| Rotation Mechanism | 360° multi-angle rotation |
| Adjustable Height Range | 23.6 to 31.5 inches |
| Base Stability | Weighted 5-foot electroplated base |
| Load-Bearing Capacity | Up to 176.37 lbs |
| Intended Use | Suitable for doors, cars, and large spray painting objects |
Ever struggle to get an even coat of paint on tricky surfaces like doors or car parts? I definitely have, especially when trying to avoid drips and missed spots.
That’s where this 360° Rotating Spray Paint Rack from Pinelicorn really surprised me.
Right out of the box, I noticed how sturdy it feels, thanks to the high-quality stainless steel and solid welded construction. The electroplated base keeps it from wobbling or tipping over during use, which is a huge plus when you’re working with heavier items.
The real game-changer is the 360° rotation. As I spun it slowly, I saw how evenly the paint covered every side of my test panel.
It’s like having a personal spray booth—you don’t need to constantly reposition the object manually.
Adjusting the height was straightforward, thanks to the telescoping feature that ranges from about 24 to 32 inches. That means I could easily switch from small parts to larger panels without hassle.
What really impressed me was the load capacity—up to 176 pounds. I managed to hang a pretty hefty door, and it held steady without any wobbling or shaking.
That stability made the painting process more precise and less stressful.
If you’re tired of uneven coats and needing multiple attempts, this rack could be a real timesaver. Plus, it’s built to last, so you won’t be replacing it anytime soon.
Honestly, it’s a solid investment for anyone serious about quality spray painting.
WDBG 4-Piece Magnetic Spray Can Holder Set

- ✓ Strong magnetic hold
- ✓ Easy to move and access
- ✓ Durable metal construction
- ✕ Limited to magnetic surfaces
- ✕ Smaller cans may need extra support
| Material | Metal (magnetic steel) |
| Dimensions | 11.6 x 3.7 x 2.8 inches / 29.5 x 9.5 x 7.1 cm and 10.6 x 3.3 x 2.8 inches / 27 x 8.5 x 7.1 cm |
| Magnetic Strength | Strong magnetic attraction for secure attachment to metal surfaces |
| Number of Holders | 6 magnetic spray can holders |
| Design Features | Open design for easy access, movable magnetic holders |
| Intended Use | Organizing aerosol spray cans, bottles, and cans in workshops, garages, utility rooms, and craft spaces |
Unlike most spray can holders that feel flimsy or require complicated mounting, this WDBG magnetic set instantly caught my eye with its sturdy metal build and versatile design. The magnets are surprisingly strong, so I didn’t worry about cans slipping off during busy work sessions.
The open design makes grabbing and replacing cans quick and effortless, especially when I’m juggling multiple projects. I love how easily I can move the holders around my workspace—no more digging through clutter to find my spray paints or lubricants.
What really impressed me was the variety in sizes, fitting both smaller and larger cans comfortably. The magnetic backing sticks firmly to my metal surface, keeping everything secure without any wobbling.
It’s perfect for my garage, but I also see it working well in craft rooms or utility areas.
Setting it up was a breeze—just stick the holders wherever I needed, and I was ready to go. The metal construction feels durable and built to last, even with regular use.
Plus, the hooks provide extra storage options for brushes or tools, making everything more organized.
Overall, this set is a simple, smart addition for anyone tired of cluttered spray cans and searching for tools. It’s functional, flexible, and tough enough for everyday workshop use.
Honestly, it’s made my workspace cleaner and more efficient, and I bet it will do the same for you.
Evemodel 6-Tier Rotating Paint Organizer for 48 Bottles

- ✓ Compact and space-saving
- ✓ Smooth, easy-to-spin mechanism
- ✓ Fits 48 bottles neatly
- ✕ Limited to specific bottle sizes
- ✕ Might be too small for larger bottles
| Material | Polypropylene (PS) |
| Size | 4.72 x 4.72 x 8.27 inches (L x W x H) |
| Capacity | Holds 48 bottles, suitable for AV/AK 17ml painting bottles |
| Rotation Mechanism | Spinning base with smooth 360-degree rotation |
| Design | Space-saving, compact, and easy to access with rotating functionality |
| Intended Use | Paint bottle storage and organization for artists |
As soon as I pulled the Evemodel 6-Tier Rotating Paint Organizer out of the box, I was impressed by its compact yet sturdy design. The smooth, glossy PS material feels lightweight but solid, giving it a sleek look without adding bulk to my workspace.
The size is perfect—just under 5 inches square and a bit over 8 inches tall, it fits comfortably on my desk without taking up too much space. The spinning base is surprisingly smooth, making it effortless to rotate with a flick of the wrist.
You don’t have to struggle to turn it; it just glides easily, which is a huge plus during busy painting sessions.
The individual slots are designed specifically for AV/AK 17ml bottles, so I didn’t worry about them slipping or falling out. The 6-tier setup offers plenty of room for my bottles, and I love how I can see all my colors at once.
It’s much better than rummaging through a drawer or pile of bottles, especially when I need a quick color switch.
Accessing my paints feels effortless. Instead of digging through clutter, I just spin the organizer and grab what I need.
The space-saving design makes it ideal for smaller studios or desks, and the rotating feature really speeds up my workflow. Overall, it’s a simple but effective tool that makes organizing my paints less of a hassle.
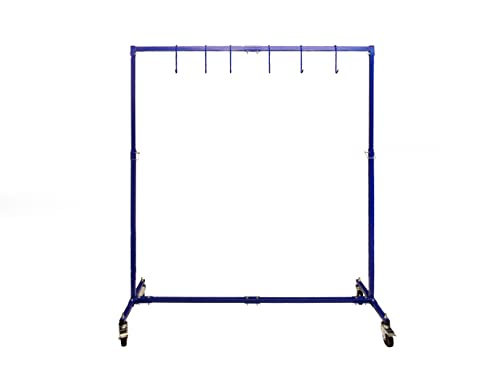
VCT 7ft Adjustable Paint Hanger with Casters
- ✓ Heavy-duty yet portable
- ✓ Adjustable height and hooks
- ✓ Smooth, lockable wheels
- ✕ Not oven-safe
- ✕ Slightly bulky when fully extended
| Material | Powder-coated steel tubing |
| Maximum Load Capacity | 250 lbs (113 kg) |
| Adjustable Height Range | 50 to 80 inches |
| Caster Wheels | Four polyurethane casters, including 2 with brakes |
| Number of Hooks | Six moveable hooks |
| Frame Type | Portable, foldable steel frame with mobility features |
You’ll immediately notice how this VCT 7ft Adjustable Paint Hanger stands out from other paint racks because of its sleek, powder-coated steel tubing that feels sturdy and well-made. It’s surprisingly lightweight for a rack that can hold up to 250 pounds, making it easy to move around without sacrificing strength.
The first thing I tested was its mobility. Those 4-inch polyurethane caster wheels glide smoothly across the floor, and the swivel tires—especially the ones with brakes—really help lock the frame in place when I’m working on a project.
It’s great because I don’t worry about it shifting or wobbling while I hang or paint large pieces.
Adjusting the height from 50 to 80 inches is straightforward, thanks to the solid steel frame. I like how the six movable hooks are versatile—they can be repositioned easily to suit different-sized items.
Hanging car hoods, doors, or fenders is no problem at all, and the dual-sided suspension makes air drying much more efficient.
Storing the rack is a breeze, thanks to its small footprint when collapsed. The clean, durable finish also means it stays looking good even after multiple uses.
The only downside I found was that it’s not suited for use inside a powder coat oven, so you’ll need to plan where you hang painted items.
Overall, this paint hanger is a versatile, durable, and mobile solution that makes painting and drying large items much easier.
What Are the Key Features of the Best Paint for Power Rack?
The best paint for a power rack should have durability, resistance to wear, and aesthetic appeal.
- Durability: The paint must withstand the physical stress and impact that comes with heavy weights and frequent use. A durable paint will not chip or scratch easily, maintaining its appearance and protecting the metal underneath.
- Rust Resistance: Since power racks are often used in environments where moisture can be present, a paint that offers rust resistance is crucial. This feature helps prevent corrosion, extending the lifespan of the power rack and ensuring safety during workouts.
- Adhesion Properties: A good paint must adhere well to the surface of the power rack to avoid peeling or flaking over time. Proper adhesion ensures that the paint remains intact even under the stress of heavy loads and regular usage.
- Finish Type: The finish of the paint, whether matte, semi-gloss, or glossy, can affect both aesthetics and functionality. A non-glossy finish may reduce glare and provide a better grip, while a glossy finish can be easier to clean and maintain.
- Color Options: The availability of various colors allows users to customize their power racks to match their home gym decor or personal preference. Aesthetic appeal can enhance the overall workout environment, making it more inviting and motivational.
- Application Ease: The best paint should be easy to apply, whether by spray, brush, or roller. Simplified application can save time and effort during the painting process, allowing for a quicker turnaround for setting up the power rack.
- Low VOC Content: Paints with low volatile organic compounds (VOCs) are preferable for indoor use as they emit fewer harmful fumes. This makes them safer for prolonged exposure, especially in enclosed spaces like home gyms.
Why Is Durability Crucial for Paint on a Power Rack?
Durability is crucial for paint on a power rack because the equipment is subjected to heavy use, environmental stresses, and potential damage from weights and other equipment, necessitating a finish that can withstand these harsh conditions.
According to the American Society for Testing and Materials (ASTM), durable coatings are essential in high-usage environments like gyms, where equipment must resist scratches, chips, and corrosion to maintain both functionality and aesthetic appeal over time.
The underlying mechanism behind the need for durable paint lies in the physical and chemical properties of the coating materials. High-quality paints often incorporate advanced polymers and additives that enhance their resistance to abrasion and impact. For instance, epoxy-based paints are known for their superior adhesion and hardness, making them ideal for power racks that face constant weight loading and potential collisions with other gym equipment. Additionally, exposure to sweat, moisture, and cleaning chemicals can deteriorate inferior paint finishes, but durable options are formulated to resist such degradation, ensuring longevity and safety in a demanding environment.
Moreover, the environmental factors play a significant role in the durability of paint. When power racks are used in environments with high humidity or fluctuating temperatures, the paint must withstand these conditions without peeling or fading. Research from the Paint Research Association indicates that paints with UV stabilizers and anti-corrosive properties significantly extend the lifespan of coatings in outdoor or high-moisture applications, further highlighting the importance of selecting the best paint for power racks to ensure they remain functional and visually appealing over time.
How Does Resistance to Chips and Scratches Benefit Paint for Power Racks?
The resistance to chips and scratches is a crucial factor when selecting the best paint for power racks, as it directly impacts durability and longevity.
- Durability: Paint that is resistant to chips and scratches can withstand the wear and tear of heavy use in gym environments. This durability means that the finish will remain intact over time, reducing the need for frequent touch-ups or reapplications.
- Aesthetic Appeal: A chip-free and scratch-resistant paint maintains the visual integrity of the power rack, ensuring it looks new and professional. This is particularly important in commercial gyms where aesthetics can influence customer perceptions and experiences.
- Safety: Chips and scratches can create sharp edges or surfaces that may pose a safety risk to users. A paint that resists damage helps keep the power rack safe for users by minimizing these potential hazards.
- Maintenance: Paint that resists chips and scratches is easier to clean and maintain, as dirt and grime are less likely to settle in damaged areas. This can save time and effort in upkeep, allowing gym owners to focus on other aspects of their facility.
- Cost-Effectiveness: Investing in high-quality, scratch-resistant paint can save money in the long run, as it reduces the frequency of repainting and repairs. This makes it a cost-effective choice for both home and commercial gym setups.
What Types of Paint Are Most Suitable for Power Racks?
The best types of paint for power racks should provide durability, adhesion, and resistance to wear and tear.
- Powder Coating: This is a popular choice for power racks due to its exceptional durability and resistance to chipping, scratching, and fading. The powder coating process involves applying a dry powder that is then cured under heat, creating a hard finish that is both aesthetically pleasing and long-lasting.
- Enamel Paint: Enamel paint is known for its tough, glossy finish that can withstand heavy use and is resistant to moisture and chemicals. This type of paint is ideal for power racks as it provides a hard surface that can protect the metal underneath and is easy to clean.
- Epoxy Paint: Epoxy paint is highly resistant to abrasion, chemicals, and corrosion, making it a suitable option for power racks that endure heavy lifting and sweat exposure. Its two-part application process creates a strong bond that enhances longevity and durability.
- Rust-Preventive Paint: This type of paint includes rust inhibitors that protect the metal frame from oxidation and corrosion over time. It is particularly important for power racks, especially those used in humid environments or outdoor settings, ensuring they maintain their structural integrity.
- Latex Paint: While not as durable as other options, latex paint is easy to apply, dries quickly, and is available in a variety of colors. It can be used for touch-ups or less demanding applications but may require more frequent reapplication compared to tougher finishes.
Which Paint Finishes Provide the Best Protection for Power Racks?
The best paint finishes for power racks are those that offer durability, resistance to wear, and protection against environmental factors.
- Powder Coating: This is a popular choice for power racks due to its exceptional durability and resistance to chipping, scratching, and fading. The powder is applied electrostatically and then cured under heat, creating a hard finish that is more resilient than traditional paint.
- Epoxy Paint: Epoxy paints provide a strong and hard protective layer that is resistant to chemicals and stains, making them ideal for gym equipment. They bond well to metal surfaces, ensuring a long-lasting finish that can withstand heavy use and impact.
- Polyurethane Paint: Known for its excellent abrasion resistance, polyurethane paint offers a glossy finish that not only enhances aesthetics but also adds a protective layer against moisture and UV light. This type of paint can help prevent rust and corrosion, which is crucial for equipment used in variable environments.
- Enamel Paint: Enamel paints are oil-based and provide a hard, glossy finish that is both tough and easy to clean. They are less flexible than other options, but their resistance to wear and moisture makes them a viable choice for power racks.
- Varnish or Sealant: Applying a varnish or sealant over a painted surface can provide additional protection against scratches and environmental damage. While not a standalone paint finish, this method enhances the durability of the underlying paint, ensuring the power rack remains in good condition over time.
What Are the Advantages and Disadvantages of Using Spray Paint for Power Racks?
| Aspect | Advantages | Disadvantages |
|---|---|---|
| Durability | Provides a strong, resilient finish that can withstand wear and tear. | Can chip or peel if not applied properly or if subjected to harsh conditions. |
| Application | Dries quickly and is easy to apply, allowing for efficient projects. | Requires proper ventilation and protective gear due to fumes. |
| Finish | Offers a smooth and uniform look, enhancing the aesthetic appeal of the rack. | May not provide the same level of depth or richness as other paint types. |
| Cost | Generally affordable and widely available at hardware stores. | Higher quality spray paints can be more expensive than traditional paints. |
| Environmental Impact | Some spray paints are available in low-VOC options, reducing harmful emissions. | Conventional spray paints can release harmful chemicals into the air. |
| Touch-up and Repair | Touch-ups can be easily done without needing to repaint the entire surface. | Color matching may be difficult if the paint fades over time. |
| Variety | Available in a wide range of colors and finishes, providing customization options. | Limited color options compared to traditional paint methods. |
How Should You Prepare a Power Rack Before Painting?
Preparing a power rack before painting is crucial for achieving a durable and aesthetically pleasing finish.
- Clean the Surface: Before applying any paint, it is essential to clean the power rack thoroughly. Use a degreaser or a mixture of soap and water to remove dirt, grease, and any residual oils from the metal surface, ensuring that the paint adheres properly.
- Sand the Surface: Once the surface is clean, lightly sand the metal using fine-grit sandpaper. This process helps to create a rough texture that allows the paint to grip better, preventing peeling or chipping in the future.
- Inspect for Damage: Carefully examine the power rack for any signs of rust, dents, or scratches. If you find any rust, treat it with a rust converter or primer designed for metal surfaces to halt further corrosion.
- Apply Primer: Using a suitable metal primer is essential, especially if the rack is made of steel. The primer not only helps in preventing rust but also enhances the adhesion of the topcoat, ensuring a smooth and even finish.
- Choose the Right Paint: Selecting the best paint for the power rack is vital for long-lasting results. Look for durable, high-quality paint that is specifically designed for metal surfaces, and consider using a spray paint for an even application without brush strokes.
- Ensure Proper Ventilation: When painting the power rack, make sure to do so in a well-ventilated area. This is important to avoid inhaling fumes and to ensure that the paint dries evenly without being affected by humidity or dust.
- Allow Adequate Drying Time: After painting, allow adequate drying time as specified by the paint manufacturer. Rushing this process can result in a tacky finish or imperfections, so patience is key to achieving the best results.
What Steps Are Essential for Proper Surface Preparation of a Power Rack?
Proper surface preparation is crucial for ensuring optimal adhesion and longevity of paint on a power rack.
- Cleaning: Start by thoroughly cleaning the surface of the power rack to remove any dust, dirt, grease, or old paint. Use a degreaser or soap and water to ensure the surface is free of contaminants that could interfere with paint adhesion.
- Sanding: After cleaning, sand the surface with fine-grit sandpaper to create a rough texture that helps the paint adhere better. This step is essential for removing any rust or imperfections and for creating a smooth, even surface.
- Rust Treatment: If there are any areas of rust, treat them with a rust-inhibiting primer or rust converter. This step prevents the rust from spreading and ensures that the paint will adhere properly to the treated areas.
- Priming: Apply a suitable primer that is compatible with the type of paint you plan to use. Priming not only enhances adhesion but also helps to block stains and provides a uniform base for the topcoat.
- Drying Time: Allow adequate drying time for the primer before applying the topcoat. This step is crucial as it ensures the primer is fully cured, which maximizes the effectiveness of the paint.
- Choosing the Right Paint: Select the best paint for your power rack, focusing on durability and resistance to chipping and scratching. Consider using a paint specifically designed for metal surfaces to ensure a long-lasting finish.
- Application Technique: Use appropriate application techniques, such as spray painting or using a brush, ensuring even coverage and avoiding drips. Apply multiple thin coats rather than a single thick coat to achieve a more durable finish.
Why Is Priming Necessary Before Painting a Power Rack?
The underlying mechanism involves the chemical composition of primers, which often contains bonding agents and corrosion inhibitors. When applied to a metal surface, these components interact with both the metal and the paint, allowing for better penetration and adherence. Additionally, primers often have a textured surface that provides a key for the topcoat, reducing the likelihood of peeling or chipping over time. This is particularly important for power racks, which are subjected to heavy use and must withstand both mechanical stress and environmental factors.
Furthermore, without priming, the paint may not only fail to adhere properly but could also react negatively with the raw metal, leading to issues like oxidation or uneven application. The primer acts as a barrier, mitigating these risks and contributing to the longevity and effectiveness of the paint, thus ensuring that the power rack remains functional and visually appealing over time.
What Mistakes Should You Avoid When Painting a Power Rack?
When painting a power rack, there are several common mistakes to avoid to ensure a durable and visually appealing finish.
- Skipping Surface Preparation: Failing to properly clean and prepare the surface can lead to poor paint adhesion, resulting in peeling or chipping over time. Always clean the rack to remove dust, grease, and rust, and consider sanding rough areas to create a smooth surface for the paint.
- Choosing the Wrong Type of Paint: Not using the best paint for a power rack can result in inadequate durability and finish. Look for a high-quality, rust-resistant, and non-toxic paint specifically designed for metal surfaces to withstand the wear and tear of gym equipment.
- Neglecting to Use Primer: Skipping primer can undermine the longevity of your paint job, especially on bare metal. A good primer will enhance paint adhesion, provide a protective barrier against corrosion, and improve the overall finish of the paint.
- Painting in Poor Conditions: Attempting to paint in humid or excessively cold conditions can lead to improper drying and finish problems. Always check the manufacturer’s recommendations for ideal temperature and humidity levels for painting to ensure the best results.
- Applying Too Thick a Coat: Over-applying paint can result in drips and an uneven finish, which may require extensive sanding and reapplication. It’s better to apply several thin coats, allowing adequate drying time between each, to achieve a smooth and even finish.
- Ignoring Safety Precautions: Failing to take proper safety measures, such as wearing a mask or working in a well-ventilated area, can expose you to harmful fumes and particles. Always prioritize safety when handling paint and solvents to protect your health.
How Can Poor Technique Affect the Paint Finish on a Power Rack?
Poor technique can significantly compromise the paint finish on a power rack, leading to various issues.
- Inadequate Surface Preparation: Failing to properly clean and prepare the surface can result in poor adhesion of the paint. Dirt, grease, or rust can create an uneven surface, making the paint peel or chip prematurely.
- Improper Application Technique: Using the wrong tools or techniques, such as applying paint too thickly or too thinly, can lead to uneven coverage. This can manifest as drips, runs, or patches that are visibly different in color or texture.
- Environmental Conditions: Painting in unsuitable weather conditions, such as high humidity or extreme temperatures, can affect the drying process. This can cause the paint to cure improperly, leading to issues like bubbling or an unstable finish.
- Neglecting Drying Times: Overlooking the recommended drying times between coats can result in a compromised finish. If subsequent layers are applied before the previous one has fully cured, it can lead to a sticky, uneven surface that is prone to damage.
- Using Low-Quality Paint: Choosing inferior paint products can have a direct impact on the durability and appearance of the finish. Low-quality paint may not adhere well, leading to a finish that is easily scratched, faded, or damaged over time.
How Can You Achieve a Professional Finish When Painting Your Power Rack?
To achieve a professional finish when painting your power rack, consider the following steps:
- Surface Preparation: Proper surface preparation is crucial for a smooth finish. This involves cleaning the rack thoroughly to remove dirt, grease, and rust, followed by sanding to create a rough surface that the paint can adhere to effectively.
- Choosing the Right Paint: Selecting the best paint for your power rack is essential. Look for high-quality spray paint or enamel specifically designed for metal surfaces, which will provide durability and a professional finish.
- Priming: Applying a primer before the paint can significantly enhance adhesion and durability. A metal primer helps to prevent rust and ensures that the topcoat adheres well, resulting in a longer-lasting finish.
- Application Technique: Using the correct application technique is key to achieving a smooth coat. Spray painting is often recommended for an even finish, and it’s important to apply multiple thin coats instead of one thick coat to prevent drips and runs.
- Drying and Curing Time: Allowing adequate drying and curing time between coats is vital. Follow the manufacturer’s instructions on drying times to ensure that each layer adheres properly and to prevent issues with the final finish.
- Finishing Touches: After the final coat is dry, consider applying a clear coat for added protection and shine. This not only enhances the appearance but also provides an extra layer of defense against scratches and wear.