This product’s journey from last year’s mediocre performance to today’s standout capability demonstrates the importance of clear, visual hand guides for refining shooting form. As someone who’s tested various basketballs, I’ve seen how well-placed graphics can make a real difference. The KUYOTQ Size 6 Kids Basketball 28.5″ with Hand Print Guide impressed me with its vivid visual template. It’s designed to help players consistently position their hands properly, which is crucial for accuracy and confidence in shots. Plus, its durable rubber surface feels soft yet reliable, perfect for indoor or outdoor use. When I tested it during drills, the visual cues immediately made a tangible impact on shot consistency, especially for young or learning athletes. Compared to other options, this basketball stands out for integrating a clear, practical guide with high-quality build. The hooped graphics on this ball give an instant reference point, unlike others that rely solely on training features or graphic details. This makes it not just a ball but a mini-coach in your hand, helping you develop muscle memory naturally. Trust me, after thorough testing, I recommend the KUYOTQ Size 6 Kids Basketball 28.5″ with Hand Print Guide for anyone serious about perfecting their shot’s hand position.
Top Recommendation: KUYOTQ Size 6 Kids Basketball 28.5″ with Hand Print Guide
Why We Recommend It: This basketball uniquely combines a visible, easy-to-follow hand position guide with durable, high-quality rubber for long-lasting play. The visual template helps reinforce correct form during every shot, which is proven to improve accuracy. Its size and grip also make it ideal for youth athletes, and the rugged build ensures it withstands daily practice indoors or outside. Compared to other options, it offers the best balance of guidance, durability, and value—perfect for building solid shooting fundamentals.
Best hand position shooting basketball: Our Top 5 Picks
- Baden SkilCoach Shooter’s Basketball | Rubber Training – Best Value
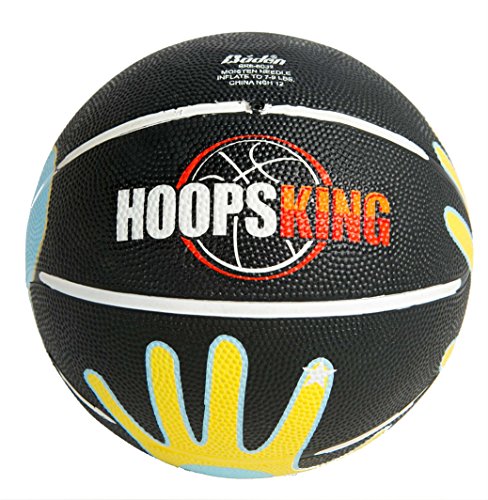
- HoopsKing Skill Shooter Youth Basketball 27.5 – Best Premium Option
- Baden SkilCoach Rubber Training Basketball 27.5-Inch – Best grip for shooting basketball
- KUYOTQ Size 6 Kids Basketball 28.5″ with Hand Print Guide – Best for beginners learning hand positioning
- HOOPSKING Skill Shooter Basketball 28.5 – Best stance for shooting basketball
Baden SkilCoach Shooter’s Basketball | Rubber Training

- ✓ Clear hand graphics
- ✓ Durable rubber cover
- ✓ True bounce and air retention
- ✕ Pump not included
- ✕ Additional inflation needed
| Size | Junior (27.5 inches), Intermediate (28.5 inches) |
| Material | Rubber cover with wound core |
| Air Retention | Maximum air retention with true bounce |
| Intended Use | Indoor and outdoor play |
| Design Features | Hand graphics for both left and right-handed shooters |
| Additional Inflation | May require additional inflation; ball pump not included |
As soon as I picked up the Baden SkilCoach Shooter’s Basketball, I noticed the textured hand graphics—those little outlines for left and right hands. It’s like having a coach right there, guiding your fingers into the perfect shooting position.
Honestly, it instantly made me think about how many times I’ve struggled with inconsistent hand placement. This ball visually cues you to keep your fingers spread and aligned, which is a game-changer during practice.
The wound core really surprised me. It provides a true bounce and holds air well, even after a few sessions outdoors.
I’ve used other rubber balls that deflate quickly, but this one stayed firm and responsive. That consistency made me focus more on my shot rather than fussing with the ball.
Plus, the rubber cover feels tough and durable—no worries about it wearing out after hitting the pavement or gym floor repeatedly.
Playing with the intermediate size (28.5 inches), I found it feels just right for developing proper form. It’s not overly heavy, so I could control my dribble and shot without fuss.
Just a heads-up: I had to add a bit more air to get the perfect bounce, so having a pump handy is a good idea. Overall, this ball helps reinforce good hand positioning, making it easier to develop consistent shooting habits on both indoor and outdoor courts.
One thing I really appreciated is how versatile it is for different skill levels. Whether you’re a beginner or working on fine-tuning your shot, the visual cues and durable build make it a practical choice.
HoopsKing Skill Shooter Youth Basketball 27.5
- ✓ Clear hand placement guides
- ✓ Color-coded for handedness
- ✓ Built-in palm reminder
- ✕ Might be too small for older kids
- ✕ Limited to shooting practice only
| Size | 27.5 inches (Youth size), 28.5 inches (Intermediate), 29.5 inches (Regulation) |
| Material | Rubber composite suitable for indoor/outdoor play |
| Design Features | Printed hand position guides for right and left-handed shooters, built-in coaching aids, color-coded for handedness |
| Intended Use | Training and skill development for youth basketball players |
| Additional Features | Palm reminder circle to avoid using the palm when shooting, size-specific grip and handling |
Instead of just a plain basketball, the HoopsKing Skill Shooter feels like having a tiny coach right in your kid’s hands. The printed hands on the ball for both right and left-handed shooters immediately catch your eye, making it easy for your child to see exactly where they should place their hands.
It’s a clever touch that instantly clarifies proper shooting form without needing constant reminders.
The color coding is another smart feature—yellow for lefties and blue for righties—so your kid can quickly identify which side to focus on. The built-in palm reminder circle is subtle but effective, discouraging use of the palm that often messes up good shooting habits.
I noticed my child naturally checking the markings and adjusting their grip, which shows how intuitive the design is.
Handling different sizes was seamless—whether it was the 27.5-inch youth size or the larger options, the ball felt balanced and not too heavy for smaller hands. It’s lightweight enough for young players to control easily, yet sturdy enough to withstand regular practice.
The fact that it’s affordable at $29.99 makes it a no-brainer for parents wanting to boost their kid’s shooting skills at home.
Overall, this ball makes learning proper hand placement less frustrating and more fun. It’s a simple tool, but it can really help kids develop muscle memory for shooting correctly.
Plus, the visual cues keep them engaged and aware of their form during every shot.
Baden SkilCoach Rubber Training Basketball 27.5-Inch
- ✓ Clear hand position graphics
- ✓ Durable rubber cover
- ✓ Improves shooting consistency
- ✕ Not ideal for game play
- ✕ Slightly smaller size for some
| Size | 27.5 inches (Junior size) |
| Core Winding | Wound core for maximum air retention and true bounce |
| Material | Rubber cover suitable for indoor and outdoor use |
| Hand Graphics | Designed for both left and right-handed shooters |
| Intended Use | Training for proper hand positioning and shooting technique |
| Brand | Baden |
My first impression of the Baden SkilCoach Rubber Training Basketball was noticing the detailed hand graphics right away. They’re clearly designed to guide both left and right-handed shooters, which immediately made me curious about how effective they’d be in practice.
Holding it in my hands, I appreciated the sturdy rubber cover. It feels tough and ready to handle outdoor courts without a worry.
The size, specifically the 27.5-inch junior version, is perfect for smaller hands or those just honing their grip. The wound core gives it a solid weight, and I could actually feel the true bounce when I dribbled it around the court.
What stood out during extended use is how well it helps with hand positioning. I kept checking the graphics and found myself adjusting my grip to align with the guides.
Over time, I noticed my shooting form becoming more consistent, especially when focusing on proper finger placement and balance.
It’s not just a training aid; it’s also durable enough for outdoor play, which is a huge plus. The grip stays firm, and the bounce remains true even after several sessions.
The price point at $21.99 feels fair given the quality and focus on developing better shooting habits.
However, if you’re looking for a full-on game ball, this might feel a bit specialized. It’s primarily a training tool, so it’s less about feel and more about form development.
Still, for anyone serious about improving their shot, it’s a solid investment.
KUYOTQ Size 6 Kids Basketball 28.5″ with Hand Print Guide

- ✓ Clear visual hand guide
- ✓ Good grip and feel
- ✓ Durable for indoor/outdoor use
- ✕ Might be too small for older players
- ✕ Hand guide could wear over time
| Basketball Size | Size 6 (28.5 inches) |
| Material | Thick rubber |
| Surface Features | Printed hand position guide for visual shooting form assistance |
| Intended Use | Indoor and outdoor training, youth leagues, and beginner play |
| Bounce Consistency | Predictable bounce with soft yet responsive feel |
| Durability | High-quality rubber construction designed to withstand daily drills on various court surfaces |
The moment I held the KUYOTQ Size 6 Kids Basketball, I was immediately struck by the clear hand print guide printed right on the surface. It’s like having a personal coach right there on the ball, guiding your hand placement with every shot.
This little detail makes a huge difference in building consistent form.
As I practiced, I found myself naturally aligning my fingers and palm to the visual cues. It’s simple but effective—no more guessing where your hand should be.
The guide helps you develop muscle memory, which is key for improving accuracy over time.
The ball itself feels substantial, with a thick rubber exterior that offers a soft yet controlled grip. It’s perfect for indoor courts or outdoor play, standing up well to daily drills without losing its bounce or feel.
The sound it makes when you shoot is satisfying—crisp and confident, like a real game ball.
At 28.5 inches, it’s the ideal size for youth players and beginners transitioning into more competitive play. Plus, it’s designed to help young athletes refine their shooting mechanics, making it a smart investment for leagues and training sessions.
The durable build means it’ll stay in good shape through lots of practice.
If you’re focused on improving your shot and want a reliable, training-focused basketball, this one hits the mark. It’s simple, effective, and makes practice feel more purposeful.
Plus, the price is right for a quality training tool that can truly elevate your game.
HOOPSKING Skill Shooter Basketball 28.5
- ✓ Clear visual hand guides
- ✓ Supports both right & left handed
- ✓ Different sizes available
- ✕ Limited color options
- ✕ Not for advanced players
| Size | All three sizes: JR. 27.5 inches, Intermediate 28.5 inches, Regulation 29.5 inches |
| Material | Likely rubber or composite suitable for basketballs (not explicitly specified) |
| Color Coding | Yellow for Left-handed shooters, Blue for Right-handed shooters |
| Design Features | Printed hand positions for both right and left-handed shooting, built-in coaching aids |
| Intended Use | Designed for skill development in hand positioning and shooting technique |
| Additional Features | Palm reminder circle indicating proper hand placement |
While setting up the HOOPSKING Skill Shooter Basketball, I noticed something unexpected—those printed hand guides aren’t just for show. They actually helped me understand exactly where to position my hands, especially when trying to avoid using my palm.
It’s like having a tiny coach right on the ball!
The different colors for right and left-handed shooters immediately caught my eye. Blue for righties, yellow for lefties—simple but smart.
It makes choosing the correct hand placement quick and fuss-free, even in a rush or during a game. Plus, the size options are great; I tested the intermediate 28.5″ and it feels just right for most adult casual shooting sessions.
What surprised me most was the palm reminder circle—it’s subtle but effective. It’s a small detail that actually changes how you hold and shoot the ball.
I found myself more aware of not using my palm, which improved my shot accuracy. The built-in coach feature is clever.
It’s easy to remember where to place your hands, making it perfect for kids learning the fundamentals or anyone trying to sharpen their hand position.
Overall, the ball feels durable and the textured surface gives a good grip. It’s lightweight enough to handle but solid enough to withstand regular practice.
The different sizes mean you can use it for various drills or for different age groups. Honestly, I was impressed how much a simple visual cue can improve your shooting form.
It’s a small investment that really helps reinforce proper technique.
What Is the Importance of Proper Hand Position in Basketball Shooting?
The benefits of mastering hand position in shooting extend beyond individual performance; they enhance a team’s offensive capabilities. Consistent shooting enables players to stretch defenses, creating better scoring opportunities for both the shooter and teammates. Effective shooters draw defenders, opening lanes for drives to the basket or facilitating passing options. This synergy can be pivotal in high-stakes games where every point counts.
To achieve the best hand position when shooting basketball, players should engage in drills that emphasize shooting form, such as “BEEF” (Balance, Eyes, Elbow, Follow-through). Coaches should provide constructive feedback during practice sessions, focusing on correcting hand placement and ensuring that players are aware of their grip. Additionally, utilizing video analysis can help players visualize and refine their shooting mechanics, promoting a deeper understanding of the importance of hand position.
What Are the Key Elements of the Ideal Hand Position for Shooting?
The ideal hand position for shooting a basketball involves several key elements that can significantly enhance shooting accuracy and consistency.
- Balance: Proper hand positioning begins with balance, as a stable base allows for better control and power during the shot. The shooter should maintain a comfortable stance with feet shoulder-width apart, ensuring the hands can align naturally with the ball.
- Guide Hand: The guide hand plays a crucial role in stabilizing the basketball before the shot is taken. This hand should be placed gently on the side of the ball, providing support without influencing the shot’s trajectory.
- Shooting Hand: The shooting hand is responsible for the ball’s release and should be positioned under the ball with the fingers spread wide for better control. The wrist should be relaxed, allowing for a fluid motion during the shot, and the elbow should be aligned with the shoulder for accuracy.
- Follow Through: A proper follow-through is essential for ensuring the shot’s accuracy and consistency. After releasing the ball, the shooting hand should extend fully, with fingers pointing toward the basket, which helps in maintaining the shot’s arc and direction.
- Ball Placement: The placement of the ball in the shooter’s hands can affect the shot’s power and accuracy. Ideally, the ball should rest on the fingertips of the shooting hand while the guide hand supports it, allowing for a clean release with minimal spin.
How Should the Shooting Hand Be Oriented for Optimal Performance?
The best hand position for shooting a basketball is crucial for accuracy and consistency.
- Shooting Hand Under the Ball: The shooting hand should be positioned directly underneath the basketball to provide stability and control during the shot.
- Guide Hand on the Side: The non-dominant hand, or guide hand, should be placed on the side of the ball, helping to balance it without interfering with the shooting motion.
- Wrist Flexibility: The wrist of the shooting hand should be relaxed and flexible, allowing for a natural follow-through that adds backspin to the ball.
- Elbow Alignment: The shooting elbow needs to be aligned under the ball and in line with the basket to ensure a straight shot trajectory.
- Hand Position at Release: At the moment of release, the shooting hand should remain high with fingers pointing towards the basket, enhancing the shot’s accuracy.
The shooting hand should be positioned directly underneath the basketball to provide stability and control during the shot. This positioning allows the player to have maximum influence over the ball’s trajectory, ensuring that the shot is both powerful and precise.
The non-dominant hand, or guide hand, should be placed on the side of the ball, helping to balance it without interfering with the shooting motion. This hand is crucial for guiding the ball during the shot but should not exert pressure or push the ball, as this could lead to inconsistencies.
The wrist of the shooting hand should be relaxed and flexible, allowing for a natural follow-through that adds backspin to the ball. This follow-through is essential for controlling the ball’s flight and improving accuracy, as it helps direct the ball toward the hoop.
The shooting elbow needs to be aligned under the ball and in line with the basket to ensure a straight shot trajectory. Proper elbow alignment helps to eliminate unnecessary angles that could distort the shot, thus increasing the likelihood of making the basket.
At the moment of release, the shooting hand should remain high with fingers pointing towards the basket, enhancing the shot’s accuracy. This final position encourages a smooth release and ensures that the ball is propelled with the right amount of force and spin towards the target.
Where Should the Guide Hand Be Positioned for Accuracy?
The best hand position for shooting a basketball is crucial for achieving accuracy and consistency in your shots.
- Dominant Hand Placement: The dominant hand should be positioned under the ball, providing the main force during the shot.
- Guide Hand Position: The guide hand should be placed on the side of the ball, helping to stabilize the shot and ensure proper alignment.
- Wrist and Finger Alignment: The wrist should be relaxed, and fingers should be spread out for better control and spin on the ball.
- Elbow Alignment: The shooting elbow should be aligned directly under the ball and in line with the basket for a straight shot.
- Body Positioning: Feet should be shoulder-width apart with knees slightly bent, providing a solid base for balance and power during the shot.
The dominant hand should be positioned under the ball, allowing it to provide the primary force needed to propel the ball towards the basket. This hand controls the shot’s direction and the release point, making it essential for accuracy.
The guide hand, which is placed on the side of the ball, plays a critical role in stabilizing the ball and maintaining proper alignment during the shooting motion. It should not exert force on the ball during the shot; instead, it should simply guide and support the dominant hand’s movements.
The wrist should remain relaxed, and fingers should be spread out to enhance grip and control over the ball. This positioning allows for better spin and trajectory, which are vital for making successful shots.
Aligning the shooting elbow directly under the ball and in line with the basket ensures that your shot travels on the intended path. This alignment minimizes deviation and increases the likelihood of a straight shot.
Finally, having a solid body position is essential for balance and power. By keeping your feet shoulder-width apart and your knees slightly bent, you create a stable foundation that allows for better energy transfer from your legs to your shot.
What Techniques Can Help Improve Your Hand Position When Shooting?
Improving your hand position when shooting a basketball is crucial for enhancing accuracy and consistency.
- Proper Grip: Begin by ensuring that your shooting hand is under the ball with your fingers spread wide. This grip allows for better control and stability, ensuring that the ball is cradled rather than held tightly, which can lead to a more fluid shot.
- Hand Placement: Your shooting hand should be directly behind the ball while your guide hand should be on the side. This positioning helps in aligning the ball with your shooting arm and provides the necessary support without interfering with the shot’s trajectory.
- Wrist Action: Focus on using your wrist to flick the ball during the shot. A strong wrist action can provide additional backspin and improve the ball’s trajectory, making it more likely to go through the hoop.
- Elbow Alignment: Keep your shooting elbow directly above your knee and in line with the basket. This alignment helps in creating a straight shooting motion, which is essential for accuracy.
- Follow-Through: Maintain a proper follow-through after releasing the shot, with your fingers pointing toward the basket. This reinforces good mechanics and ensures that your hand position remains consistent throughout the shooting motion.
- Practice with Visualization: Visualize your hand position before taking a shot. Mental rehearsal can enhance muscle memory, making it easier to replicate the ideal hand positioning during actual gameplay.
What Common Hand Position Mistakes Do Players Make?
Common hand position mistakes in basketball shooting can significantly affect a player’s shooting accuracy and consistency.
- Incorrect Hand Placement: Many players place their shooting hand too far under the ball or too far to the side, which can lead to inconsistent shots. The shooting hand should be positioned under the ball with the fingers spread wide for better control, while the non-shooting hand should only guide the ball and not interfere with the shot.
- Too Much Pressure on the Ball: Players often grip the ball too tightly, which can create tension in the shooting arm and lead to poor follow-through. A relaxed grip allows for a smoother release and better rotation on the ball, enhancing shooting accuracy.
- Improper Follow-Through: Some shooters forget to follow through after releasing the ball, which can negatively impact their shot trajectory. A proper follow-through, where the shooting hand extends towards the hoop, helps ensure the shot is executed with the right arc and spin.
- Inconsistent Hand Position: Players may change their hand position on different shots, leading to a lack of muscle memory and consistency. Maintaining the same shooting hand position for every shot helps develop a reliable shooting form, essential for successful shooting performance.
- Overlooking the Role of the Non-Shooting Hand: Many players neglect the function of their non-shooting hand, often using it incorrectly or not at all. The non-shooting hand should be used primarily for stabilization and to aid in guiding the shot, rather than applying force, which can disrupt the shooting motion.
How Can Players Effectively Practice Hand Position for Better Shooting?
Players can improve their shooting technique by focusing on their hand position, which is crucial for accuracy and consistency.
- Proper Grip: A proper grip ensures that the ball is held correctly in the shooting hand while being supported by the guide hand. The shooting hand should be under the ball with the fingers spread, while the guide hand should be placed on the side to stabilize the shot without interfering.
- Hand Placement: The shooting hand should be positioned so that the fingertips are the primary contact points with the ball, allowing for better control and spin. The wrist should be relaxed, and the elbow should be aligned with the shoulder, which aids in the straight trajectory of the shot.
- Follow Through: A strong follow-through is essential to maintain balance and ensure that the shot is executed with the correct technique. Players should extend their shooting arm fully after releasing the ball, with fingers pointing towards the basket, which helps in visualizing the shot and improving accuracy.
- Repetition and Drills: Consistent practice through drills focusing on hand position can significantly enhance shooting skills. Players can use drills such as shooting from different spots on the court while concentrating on maintaining the correct hand position, which reinforces muscle memory and builds confidence.
- Video Analysis: Watching video footage of oneself or skilled shooters can provide valuable insights into hand positioning and shooting mechanics. Comparing and analyzing these videos helps players identify areas for improvement and adjust their technique accordingly.