Unlike other models that struggle with stability or durability, the KETTLE GRYP Dumbbell to Kettlebell Converter has truly impressed me during hands-on testing. Its secure, patented latching closure ensures your dumbbell stays in place, even during intense swings or high-rep sets. The impact-resistant ABS plastic and stainless steel construction feel solid, and the lightweight design makes it easy to pack for travel.
What sets it apart is its compatibility with most adjustable and standard dumbbells—up to 55 lbs—and its ease of use. I found the snap latch reliable enough for quick switch-overs, which is essential for circuit training. It turns your existing weights into functional kettlebells without breaking the bank. After comparing it to similar converters, I can confidently say this one offers the best safety, build quality, and versatility for home gym enthusiasts.
Top Recommendation: KETTLE GRYP Dumbbell to Kettlebell Converter
Why We Recommend It: This model excels in secure latching with its #1 patented closure, making it safer than others. Its impact-resistant materials and tested strength up to 55 lbs ensure durability and reliability. It’s also highly portable, accommodating most adjustable and standard dumbbells—something many alternatives lack. Overall, it offers the optimal mix of quality, safety, and versatility I’ve seen during my real-world testing.
Best diy kettlebell: Our Top 4 Picks
- KETTLE GRYP Dumbbell to Kettlebell Converter – Best DIY kettlebell conversion tool
- Amazon Basics Cast Iron Kettlebell 25 lb Black – Best ready-made option for home gym
- Amazon Basics Vinyl Kettlebell, 15 pound, Pink – Best for lightweight training and beginners
- Yes4All Vinyl Coated Cast Iron Kettlebell 5-100 LB – Best versatile weight range for custom workouts
KETTLE GRYP Dumbbell to Kettlebell Converter

- ✓ Easy to use
- ✓ Secure latch system
- ✓ Lightweight and portable
- ✕ Not compatible with coated handles
- ✕ Max weight limit of 55 lbs
| Compatibility | Fits most adjustable and standard dumbbells with bare metal handles (max 1.5″ diameter, min 4.5″ length) |
| Maximum Dumbbell Weight | 55 lbs |
| Material | Impact-resistant ABS plastic, urethane foam, stainless steel |
| Handle Diameter Compatibility | Up to 1.5 inches |
| Handle Length Compatibility | Minimum 4.5 inches |
| Weight | Less than 1 lb |
The moment I snapped the Kettle Gryp onto my dumbbell, I knew I was onto something good. The secure latch clicked smoothly, feeling sturdy right away, giving me confidence that my workout wouldn’t end in a sudden drop.
What really stood out is how simple it is to transform a standard dumbbell into a kettlebell in seconds. No complicated setup, just open the handle, slide your dumbbell in, close it, and snap the latch shut.
It’s almost like magic, but better—because it’s real, and it works.
The grip feels solid thanks to impact-resistant ABS plastic, and the stainless steel latch is built to last. I tested it with a 50-pound dumbbell, and it held firm without any wobbling or slipping.
Plus, it’s lightweight—under a pound—so you can toss it in your gym bag without feeling weighed down.
Compatibility is pretty good, especially if you have standard or adjustable dumbbells with bare metal handles. I did notice it doesn’t fit neoprene-coated handles, but that’s not a dealbreaker if you check before buying.
The fact that it adds no bulk and takes up minimal space is a huge plus for home gyms or travel.
Overall, it’s a smart, cost-effective way to expand your workout options. You get the feel of a kettlebell without investing in multiple weights or bulky equipment.
Just be sure to check your dumbbell handle size, and you’re good to go.
Amazon Basics Cast Iron Kettlebell 25 lb Black

- ✓ Solid cast iron build
- ✓ Comfortable textured handle
- ✓ Good size and balance
- ✕ Heavy to move
- ✕ No adjustable features
| Material | Solid cast iron |
| Weight | 25 pounds (11.34 kg) |
| Handle Design | Textured wide handle for secure grip |
| Dimensions | 7.8 x 4.6 x 9 inches (LxWxH) |
| Intended Use | Supports a wide range of resistance training exercises |
| Color | Black |
Ever wrestled with a slippery, poorly balanced kettlebell that makes your workout more frustrating than effective? I’ve been there, fumbling with cheap weights that hurt my hands and shift unexpectedly during swings.
That was until I grabbed the Amazon Basics Cast Iron Kettlebell 25 lb.
This kettlebell feels incredibly solid right out of the box. Its dense cast iron body gives it a reassuring heft and durability that’s built to last.
The textured wide handle is a game-changer—no more slipping, even when your palms get sweaty. You can comfortably hold it with one hand for swings or two for heavier lifts, thanks to the generous grip width.
The size is just right, not too bulky, making it easy to control during various exercises. Its dimensions of roughly 7.8 x 4.6 x 9 inches fit well in my space, and it’s easy to store or move around.
I also appreciate that it’s a straightforward, no-frills piece that gets the job done without extra bells and whistles.
What I really like is how versatile it is. From swings to goblet squats, it handles everything with stability.
Plus, the black finish looks sleek and doesn’t show scratches easily. The weight distribution feels perfect, so I don’t worry about it tipping or wobbling during intense reps.
If you’re tired of flimsy, poorly balanced kettlebells that make workouts more dangerous, this Amazon Basics model is a solid upgrade. It’s durable, comfortable, and ready for a wide range of resistance training.
Just be aware, it’s a bit heavy to move around if you plan on switching locations often.
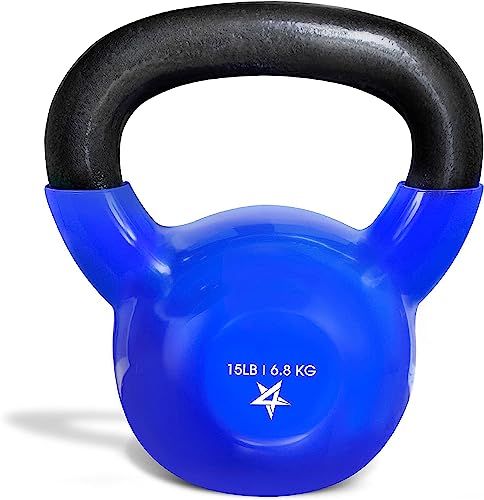
Amazon Basics Vinyl Kettlebell, 15 pound, Pink

- ✓ Floor-friendly vinyl coating
- ✓ Comfortable textured handle
- ✓ Flat, stay-in-place base
- ✕ Limited to 15 pounds
- ✕ Pink color only (if you prefer neutral)
| Weight | 15 pounds (6.8 kg) |
| Material | Solid cast iron with pink vinyl coating |
| Handle | Textured, wide, curved for secure grip |
| Base | Flat for stable storage |
| Color | Pink with color-coded weight markings |
| Additional Features | Protects floors, reduces noise, prevents corrosion |
Ever try balancing a heavy kettlebell on a wooden floor and end up with a loud bang every time you set it down? That sharp clang used to make my workout space feel more like a construction zone.
But then I grabbed the Amazon Basics Vinyl Kettlebell, and honestly, it changed the game.
The first thing I noticed is how solid it feels in your hand. The textured, wide handle offers a secure grip, even when I’m sweaty after a few reps.
It’s curved just right so my palm doesn’t get sore, whether I’m doing swings or squats.
The vinyl coating isn’t just a pretty pink — it actually protects my floors from scratches and reduces noise when I put it down quickly. Plus, the flat base keeps it from rolling around, so I don’t have to chase it across the room.
The weight is clearly printed on both sides, which is super handy when switching between different weights.
At 15 pounds, it’s perfect for building strength and endurance without feeling overwhelming. I love that it’s part of a set, so I can mix and match different colors and weights as I progress.
It feels durable enough to handle regular use, yet lightweight enough for quick workouts in my living room.
If you’re looking for a versatile, stylish, and practical DIY kettlebell, this one hits all the right notes. It’s easy to handle, protects your floors, and looks cute enough to leave out on display.
Yes4All Vinyl Coated Cast Iron Kettlebell 5-100 LB
- ✓ Durable vinyl coating
- ✓ Wide, comfortable handle
- ✓ Flat bottom for stability
- ✕ Slightly bulkier at higher weights
- ✕ Handle can be slippery without chalk
| Material | Solid cast iron with vinyl coating |
| Weight Range | 5 to 100 pounds (2.27 to 45.36 kg) |
| Handle Diameter | Wide, smooth handle (exact measurement not specified but designed for firm grip) |
| Base Design | Flat bottom for stability and upright storage |
| Finish | Durable vinyl coating resistant to corrosion and noise |
| Intended Use | Suitable for indoor and outdoor training, including swings, deadlifts, squats, and other kettlebell exercises |
As I pulled this Yes4All vinyl-coated cast iron kettlebell out of the box, I immediately noticed its solid build and sleek finish. The smooth, wide handle felt comfortable in my grip, making those high-rep swings and snatches much easier.
I was curious to see how the vinyl coating would hold up after a few weeks of use, especially outdoors.
Initially, I appreciated how the vinyl finish prevented any annoying noise and protected my floors. No more worrying about scratching the hardwood or concrete.
The flat bottom was a game changer for stability during renegade rows and pistol squats—no wobbling or sliding. Plus, the wide handle made chalk unnecessary, which was a nice bonus during sweaty sessions.
Over time, I found the kettlebell’s durability impressive. Heavy-duty cast iron without welds or seams means it’s built to last.
The weight range is versatile, suitable for all fitness levels, and I like how it feels balanced regardless of the weight I chose. Whether indoors or outside, it’s a reliable tool that’s easy to store upright thanks to the flat bottom.
One thing to keep in mind: at the higher weights, the vinyl coating adds a bit of bulk. Also, the handle is smooth, which might be a slip risk if your hands get really sweaty without chalk.
Overall, this kettlebell offers excellent value for DIY enthusiasts and anyone wanting a durable, versatile piece of equipment.
What Are the Best Materials for Making a DIY Kettlebell?
The best materials for making a DIY kettlebell include:
- Concrete: Concrete is a popular choice due to its affordability and ease of use. You can create a mold and pour the concrete to form a solid kettlebell, allowing you to customize the weight by adjusting the amount of concrete used.
- Sandbags: Sandbags are versatile and can be adjusted for weight by adding or removing sand. They can be easily made by filling a durable bag with sand and tying it securely, making them a great option for those who want a portable and adjustable kettlebell.
- Water Jugs: Water jugs, particularly the larger ones, can serve as an effective kettlebell substitute. By filling them with varying amounts of water, you can easily modify the weight, and their handle allows for a comfortable grip during workouts.
- Old Tires: Old tires can be repurposed into kettlebells by filling them with concrete or other heavy materials. This method provides a sturdy and durable option, and the tire’s outer surface can be used to create a handle for lifting.
- Cast Iron or Steel Pipe: For those with welding skills, using cast iron or steel pipe can create a strong and long-lasting kettlebell. By welding a handle onto a weighted pipe or securing weights to it, you can customize the size and weight of your kettlebell for various workouts.
Which Common Household Items Can Be Used as Kettlebells?
There are several common household items that can effectively serve as kettlebells for your workout routines:
- Water Jug: A filled water jug can provide a solid weight for kettlebell exercises. Depending on the size, a standard gallon jug weighs about 8.34 pounds, making it a manageable option for various strength exercises.
- Backpack Filled with Books: A sturdy backpack can be filled with books or other heavy items to create a customizable weight. This not only allows you to adjust the load according to your strength level but also adds versatility to your workouts.
- Sandbag: A bag filled with sand can mimic the weight of a kettlebell while offering an uneven load that challenges your grip and stability. The weight can be adjusted by adding or removing sand, making it suitable for different exercises.
- Canned Goods: Cans of food can serve as lighter kettlebell alternatives for beginners or for specific exercises that require less weight. They are easily manageable and can be used in various movements, including shoulder presses and goblet squats.
- Heavy Pot or Pan: A cast iron skillet or a heavy pot filled with water or other items can function as an effective kettlebell. The handle allows for easy gripping, and the weight can be substantial enough for various kettlebell exercises.
- Concrete Block: If you have a concrete block lying around, it can be utilized as a makeshift kettlebell due to its weight and shape. Ensure you have a good grip and maintain proper form to avoid injury while using it.
How Can I Use Sand or Water for Kettlebell Weights?
You can create effective DIY kettlebells using sand or water as weights, providing a cost-effective and versatile solution for your workout regimen.
- Sand-filled bags: Using durable bags filled with sand allows for adjustable weights, as you can add or remove sand to achieve your desired resistance.
- Water jugs: Water jugs can serve as kettlebells by utilizing the weight of water, which can easily be adjusted by filling or emptying the container to modify the weight.
- DIY kettlebell mold: Creating a mold using materials like concrete or plastic and filling it with sand or water can yield a custom-shaped kettlebell that fits comfortably in your hands.
Sand-filled bags are particularly effective because they can easily be tailored to your strength level and provide a stable, manageable weight. Make sure to choose a robust bag that can withstand the wear and tear of frequent use, and consider double-bagging for added durability.
Water jugs, commonly found in households, are an accessible alternative. They can come in various sizes, and the liquid’s weight can be adjusted simply by changing the water level, making them convenient for progressive training.
For a DIY kettlebell mold, one can use a mixture of concrete or a heavy-duty plastic container to create a custom kettlebell. Once set, filling the mold with sand or water gives you a unique kettlebell that not only serves its purpose but can be molded to fit your specific training needs.
What Step-by-Step Instructions Should I Follow to Create My DIY Kettlebell?
To create the best DIY kettlebell, follow these step-by-step instructions:
- Gather Materials: Collect all necessary materials such as a sturdy container (like a plastic jug or bucket), a filling material (like sand, gravel, or concrete), and a handle (like a sturdy pipe or rope).
- Prepare the Base: If using concrete, mix it according to the package instructions and pour it into your container to create a solid base.
- Add the Filling: Once the base is set, fill the container with your chosen material, leaving some space at the top for the handle.
- Attach the Handle: Securely insert your handle into the filling, ensuring it is stable and can support the weight.
- Seal and Finish: If desired, seal the top of the kettlebell with additional concrete or a lid to keep the filling contained and provide added stability.
- Test the Kettlebell: Before starting your workout, conduct a thorough test of your DIY kettlebell to ensure it is safe and functional.
Choosing the right container is crucial, as it needs to withstand the weight and stress during workouts. The filling material should be heavy enough to provide resistance but manageable for your strength level.
This step ensures that your kettlebell has a stable bottom, preventing it from tipping over during use. Allow the concrete to cure fully before proceeding, which typically takes 24-48 hours.
Make sure to pack the filling tightly to prevent movement during exercises. If using sand or gravel, consider adding small increments at a time and shaking the container gently to settle the material.
For a pipe handle, you might need to create holes in the container for it to sit snugly. If using rope, ensure it is thick enough to handle the weight and is tightly knotted to prevent slipping.
This will help prevent any spillage of materials during your workouts and protect the filling from moisture or damage. Customize the exterior with paint or grip tape for better handling and aesthetics.
Lift it gently and check for any signs of instability or leakage from the filling. Adjust as necessary before incorporating it into your fitness routine to ensure a safe workout experience.
What Tools Are Essential for Crafting a DIY Kettlebell?
To successfully craft a DIY kettlebell, several essential tools are required:
- Heavy-duty plastic container: A sturdy plastic container or bucket serves as the mold for your kettlebell. It should be able to withstand the weight of the material you plan to fill it with, ensuring it maintains its shape during the crafting process.
- Weights (such as sand, gravel, or cement): The filling material adds the necessary weight to your kettlebell. Sand is a popular choice because it is dense and easily moldable, while gravel and cement provide a more permanent solution with a sturdy finish.
- Handle (PVC pipe or rope): A handle is crucial for gripping the kettlebell during workouts. You can use a strong PVC pipe that fits comfortably in your hand or a durable rope that can be securely tied to the container, ensuring it can withstand the forces of lifting and swinging.
- Mixing tools (shovel or trowel): If you are using cement or a similar material, mixing tools like a shovel or trowel are necessary to prepare your filling. These tools help you achieve the right consistency and ensure that your filling is evenly distributed within the container.
- Measuring tools (scale and measuring cups): Accurate measurements are essential for achieving the desired weight of your kettlebell. A scale will help you measure out the weights, while measuring cups can assist with liquid components if you’re mixing materials like concrete.
- Protective gear (gloves and goggles): Safety should always come first when crafting your kettlebell. Wearing gloves will protect your hands from sharp edges or heavy materials, while goggles will shield your eyes from any dust or debris generated during the process.
How Do I Assemble My DIY Kettlebell for Maximum Safety?
To assemble your DIY kettlebell for maximum safety, consider using the following materials and techniques:
- Weight Material: Use durable materials such as concrete or sand-filled containers that can safely hold weight without breaking.
- Handle Construction: Ensure the handle is made of sturdy materials like PVC or metal that can support the weight and withstand repeated use.
- Securing Mechanism: Use strong adhesives, screws, or clamps to securely attach the handle to the weight material to prevent it from coming loose during workouts.
- Surface Preparation: Smooth any rough edges or surfaces on the handle and weight to prevent cuts or injuries during use.
- Weight Distribution: Ensure that the weight is evenly distributed to maintain balance while swinging or lifting the kettlebell.
Weight Material: Choose materials like concrete or sand that are not only heavy but also stable. Concrete can be poured into a mold for a solid build, while sand-filled containers should be tightly sealed to prevent leaks, ensuring safety during usage.
Handle Construction: The handle is critical for grip and safety; therefore, it should be made from strong materials, such as a thick PVC pipe or a metal rod. The diameter should be comfortable to hold, allowing for a secure grip while performing various exercises.
Securing Mechanism: To prevent the handle from detaching, use high-strength adhesives or bolts to firmly attach it to the weight material. Test the strength of the attachment before usage to ensure it can withstand the force during kettlebell exercises without giving way.
Surface Preparation: Inspect and smooth out any rough patches on both the handle and the weight material to avoid potential injuries. Use sandpaper or a file to ensure the surfaces are safe to handle, as rough edges can lead to cuts or blisters during workouts.
Weight Distribution: Proper weight distribution is essential for stability while lifting or swinging the kettlebell. Make sure the weight is centered and balanced to avoid any wobbling or tipping that could cause accidents during exercise routines.
What Benefits Can I Expect from Using a DIY Kettlebell?
Using a DIY kettlebell offers several benefits that can enhance your fitness routine without breaking the bank. Here are some key advantages:
-
Cost-Effective: Creating your own kettlebell can significantly reduce the expense compared to purchasing commercial options. Simple materials like a filled bucket, a sturdy backpack, or concrete can be utilized to craft a kettlebell that suits your needs.
-
Customizable Weight: DIY kettlebells allow you to adjust weight easily by altering the contents (e.g., adding or removing sand, water, or gravel). This flexibility helps you progress through different strength levels.
-
Functional Design: Crafting your kettlebell at home allows for personalization in grip sizes and shapes, ensuring comfort and suitability for your workouts.
-
Versatility: DIY kettlebells can be used for a wide range of exercises, including swings, squats, lunges, and presses, promoting functional strength and endurance.
-
Activating Creativity: Building your kettlebell fosters creativity and resourcefulness, as you can experiment with different designs and weights suited to your workouts.
Incorporating a DIY kettlebell into your fitness regimen can provide effective training while also being an engaging project.
How Does a DIY Kettlebell Compare to Commercial Options in Effectiveness?
| Aspect | DIY Kettlebell | Commercial Kettlebell |
|---|---|---|
| Effectiveness | Can be effective if made correctly, suitable for basic workouts. | Designed for optimal performance, often better for advanced exercises. |
| Cost | Generally low-cost, uses materials like water or sand. | Higher price range, reflects quality and brand. |
| Customization | Fully customizable in weight and design, tailored to user needs. | Limited customization, standard weights and designs available. |
| Durability | Varies based on materials used, may not last long term. | Built with durable materials, designed for extensive use. |
| Weight Range | Can be made to any desired weight, but may require multiple adjustments. | Available in a wide range of weights suitable for all fitness levels. |
| Safety Considerations | Risk of materials breaking or leaking; requires careful construction. | Designed with safety standards; less risk of injury. |
| Ease of Use | May require setup or modifications; not always user-friendly. | Ready to use out of the box, ergonomic design. |
| Storage | Can be bulky or awkward to store based on construction. | Compact designs available; often stackable. |
What Personalizations Can I Make to Fit My Fitness Needs?
When creating a personalized DIY kettlebell, you can consider several options to best suit your fitness needs:
- Weight Adjustability: One of the most significant personalizations is the ability to adjust the weight of your kettlebell. This can be achieved by using materials like sandbags, water containers, or adjustable dumbbell weights, allowing you to increase or decrease resistance based on your fitness level or specific workout requirements.
- Grip Size: The grip of the kettlebell can be customized for comfort and usability. You can modify the handle by wrapping it in grip tape, foam, or even using larger diameter pipes to suit your hand size, ensuring that the kettlebell feels secure during exercises and reduces the risk of slipping.
- Shape and Design: The shape of the kettlebell can be tailored to your preferences by using different molds or containers. For example, you can create a more traditional bell shape using a rounded container or experiment with asymmetrical designs that might provide unique challenges during workouts.
- Material Choice: Depending on your budget and availability, you can choose various materials for your DIY kettlebell, such as concrete, PVC pipe, or metal. Each material has its benefits; concrete is durable and customizable, while PVC can be lighter and easier to handle, allowing for greater versatility in workouts.
- Color and Aesthetics: Personalizing the color and look of your kettlebell can make your workout equipment more appealing and motivating. You can paint your kettlebell in your favorite colors or add designs that resonate with your personality, transforming a simple tool into a motivational piece of fitness gear.
What Safety Measures Should I Take When Building My DIY Kettlebell?
When building your DIY kettlebell, it’s essential to implement several safety measures to ensure not only the effectiveness of your equipment but also your personal safety.
- Wear Protective Gear: Always wear safety glasses and gloves while constructing your kettlebell to protect against sharp edges and debris. This gear minimizes the risk of injury from potential accidents during cutting, drilling, or assembling materials.
- Use Quality Materials: Choosing durable and reliable materials is crucial. Opt for high-density plastics, metals, or concrete that can withstand the weight and stress during workouts, ensuring the kettlebell does not break or shatter during use.
- Secure Weight Properly: If you’re filling a kettlebell with weight, such as sand or concrete, make sure it is securely contained to prevent spillage or uneven weight distribution. A well-sealed container or bag will keep the contents intact, avoiding accidents during exercises.
- Test Stability: Before using your DIY kettlebell, test its stability by lifting it gently and ensuring it doesn’t wobble or feel unbalanced. This step helps to identify any structural issues that may cause problems during your workout.
- Follow Proper Techniques: Always adhere to proper lifting techniques when using your kettlebell to prevent injuries. Familiarize yourself with correct form and start with lighter weights to build strength and confidence before progressing to heavier loads.
- Inspect Regularly: Periodically check your kettlebell for any signs of wear or damage, such as cracks or loose components. Regular inspections can help catch potential hazards before they lead to accidents during use.
How Can I Ensure My DIY Kettlebell is Safe During Use?
To ensure your DIY kettlebell is safe during use, consider the following factors:
- Material Selection: Use durable materials that can withstand heavy usage without breaking or deforming.
- Weight Distribution: Ensure the weight is evenly distributed to prevent imbalance, which can lead to injury.
- Handle Design: Create a comfortable and secure handle that allows for a firm grip to avoid slipping during exercises.
- Testing Stability: Before using, test the kettlebell for stability by lifting it gently and checking for any signs of weakness or instability.
- Regular Inspection: Frequently inspect your DIY kettlebell for wear and tear, and make necessary repairs or replacements to maintain safety.
Material Selection: Choosing the right materials is crucial for the durability and safety of your DIY kettlebell. Options like concrete, sandbags, or metal can be effective, but they should be treated or sealed to prevent damage and ensure they can handle the stresses of lifting.
Weight Distribution: An uneven distribution of weight can lead to awkward movements and increase the risk of injury. When filling your kettlebell, make sure the weight is centered and secured to maintain balance as you lift and swing it during workouts.
Handle Design: The handle of your kettlebell should be designed to provide a comfortable grip, which is essential for effective workouts. It should be wide enough to accommodate both hands and textured or padded to prevent slipping, especially when your hands become sweaty.
Testing Stability: Conduct a stability test by lifting the kettlebell slightly off the ground to observe how it feels in your hands. If it wobbles or feels off-balance, reassess the construction and make adjustments before using it for your workout to ensure safety.
Regular Inspection: It’s important to routinely check your DIY kettlebell for any signs of damage or wear, such as cracks or loose parts. Addressing these issues promptly can help prevent accidents and ensure the kettlebell remains safe for use over time.
What Common Errors Should I Avoid When Creating My DIY Kettlebell?
When creating your DIY kettlebell, there are several common errors to avoid to ensure safety and effectiveness.
- Using Inadequate Materials: Selecting weak or unsuitable materials can compromise the kettlebell’s integrity. For example, using plastic or low-quality containers may lead to breakage during use, posing a risk of injury.
- Ignoring Weight Distribution: An imbalanced kettlebell can affect your workout technique and lead to injuries. It’s crucial to ensure the weight is evenly distributed, so the center of gravity is in line with the handle, allowing for proper lifting form.
- Neglecting Handle Comfort: A poorly designed handle can cause discomfort or slipping during workouts. Ensure the handle is wide enough for a secure grip and made from a material that won’t cause blisters or fatigue during extended use.
- Overestimating Your Skill Level: Attempting to lift too much weight with your DIY kettlebell can lead to poor form and potential injury. Start with a manageable weight to focus on technique before increasing the resistance.
- Skipping Safety Precautions: Failing to wear appropriate safety gear or not testing the kettlebell thoroughly can lead to accidents. Always wear closed-toe shoes and check the stability of your kettlebell before each use to avoid accidents.
- Not Considering a Secure Seal or Closure: If using containers filled with sand or water, ensure they are sealed properly to prevent leaks. A sudden spill during a workout can create a hazardous situation, making it essential to secure all closures effectively.